Lost wax or investment casting is an ancient method of making a metal object from an original form made of wax. It’s particularly useful for making complicated metal parts. Casting is a very time consuming process so if there is a way to make a metal fitting by fabricating it, do it that way, it’s more efficient.
The process starts with a wax model. An investment mold is made around the wax model. The wax is melted out of the mold, leaving a void in the shape of the model and then the mold is filled with molten metal, creating an exact replica of the wax form in metal. Here is a tutorial showing how the process works.
Welding on the sprews
Sprews are wax bars which, once melted out of the mold, will be the channels that the molten bronze flows in through.
Here are the tools I use for welding on the sprews and preparing the waxes for casting. The bars of red wax and the round blue wax wire in the photo are what I use for making the sprews. The black rubber sprew caps are for holding the waxes while I make the molds and the steel cylinders will form the outside of the molds. Also, I have a square razor knife for cutting the sprews, a small dentist tool for paring away any excess wax and a wax welder which is similar to a wood burner, for melting the wax parts together.
Once I’ve determined what the most efficient path for the molten bronze to flow though will be, I cut an appropriate length of square wax rod and weld it to the base of the model .
I cut and fit a wax wire to bring bronze to any areas that won’t easily be reached by the main sprew or through the body of the model and weld in place.
I imagine the molten metal flowing into the cavity created by the wax and run small sprews to any high points. I’ve welded on a second sprew to the high point of the arch on the hand guard, just to be sure it fills.
Here are the two fittings with their sprews welded on, the blade collar only requires one sprew as it is so simple.
The next step is to make sure the model fits in the mold,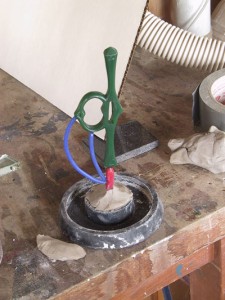 and then attach it to the rubber mold cap. I’ve attached the cross guard with potter’s clay.
On the blade collar the mold cap has a rubber sprew button with a hole in it so I stick the sprew in the hole and weld it in place with melted wax.
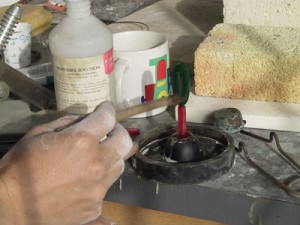
Before casting I paint the wax models with an anti-bubble solution which reduces the surface tension of the models so that air bubbles won’t stick to them and create little spheres of bronze on the finished product.
Investment
I use a pre-mixed professional casting investment called ‘Satin Cast’.
The mold cylinders have holes in them to allow the vacuum caster to create a vacuum inside the mold.
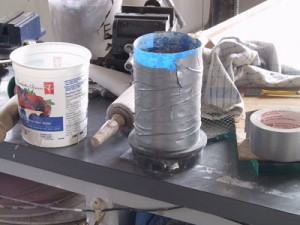
I wrap the molds in duct tape to keep the liquid investment from spilling out and tape a plastic collar on so the investment won’t overflow when I put it in the vacuum chamber. For this investment I use three cups of water,
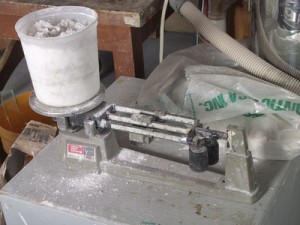
and 1700 grams of investment powder.
I set the timer for three and a half minutes to mix the investment before I vacuum it to get rid of air bubbles. I carefully pour the investment powder into the water. This process is a little like making gravy, you don’t want lumps. I wear a face mask when I’m working with the investment powder. It’s composed largely of very fine silica powder which, if you breathe enough of, will give you acute chronic silicosis.
I mix it with my hand and get any lumps out, bringing it to a nice creamy consistency.
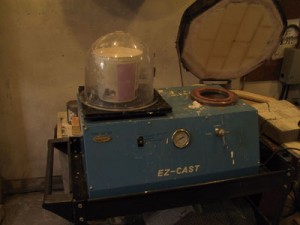
I place the liquid investment inside a vacuum bell for 60 seconds, this gets rid of the air bubbles in the solution.
Then I pour the investment in the mold until it’s almost full, leaving room for the investment to bubble when I’m removing the air in the vacuum chamber.
I place the mold in the vacuum bell for 90 second and then top it up with the last of the investment and let it set for at least two hours. Once it’s set, the investment forms a smooth hard surface.
Burnout
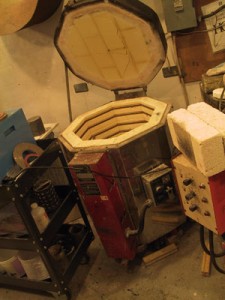
Once the investment is thoroughly set it’s time to melt the wax out of the molds and heat them. This is done to harden the investment, remove any moisture from the molds and, when casting, have the molds at a heat that doesn’t cool the bronze too quickly to insure that the spaces left by the wax fill properly. I raise the molds on fire bricks so that the wax can flow out the bottom without hindrance.
Once I have closed the kiln I set the burn-out cycle on a digital kiln controller.
2hrs to 300F
4hrs to 700F
6hrs to 900F
8hrs to 1350F
12hrs to 900F
hold at 900F







Hey Jake,
Blown away by your work. Very new to this, so forgive the dumb guy trying to get things straight!
So the wax carvings are inside the cylinder when you pour the liquid investment into it. The liquid then sets around the wax carvings. Later in the kiln the wax melts away, which then leaves a precise hollow impression of the carvings, into which you can then pour the molten bronze and therefore recreate a solid reproduction of the wax design.
Forgive me if I got the process wrong. Please, if you have the time, correct anything I have missed.
Cheers.
Hi Matt, you got it. No corrections necessary 🙂
Jake,
I have read silicon bronze has poor machinability. Given the intricacy of your pieces that are cast, if a piece does not come out as perfect in bronze as it went in as wax, is the piece scrap or salvageable?
Hi Matt, it depends. The point of casting is to get an exact copy of your wax, so if the bronze is very different than your wax, then it’s a failure. On the other hand Bronze is not difficult to work with, you can grind it, file it, and solder it, so there *is* room to work the material after casting.
That’s what I was wondering, do you always get an exact copy or does the investment ever shift during the process and cause distortion in the bronze duplicate? I am only speculating that if something goes amiss in the process it is the investment.